Forms.
Forms are made using an easy drag and drop interface. You simply map a form field to a column and each time the form is filled out it will either add a new record to the table, or update an existing. You can set a form to be open to anyone, specific people or anyone in your organisation. Forms can be easily embedded on your website or shared with URL.

Creating a form
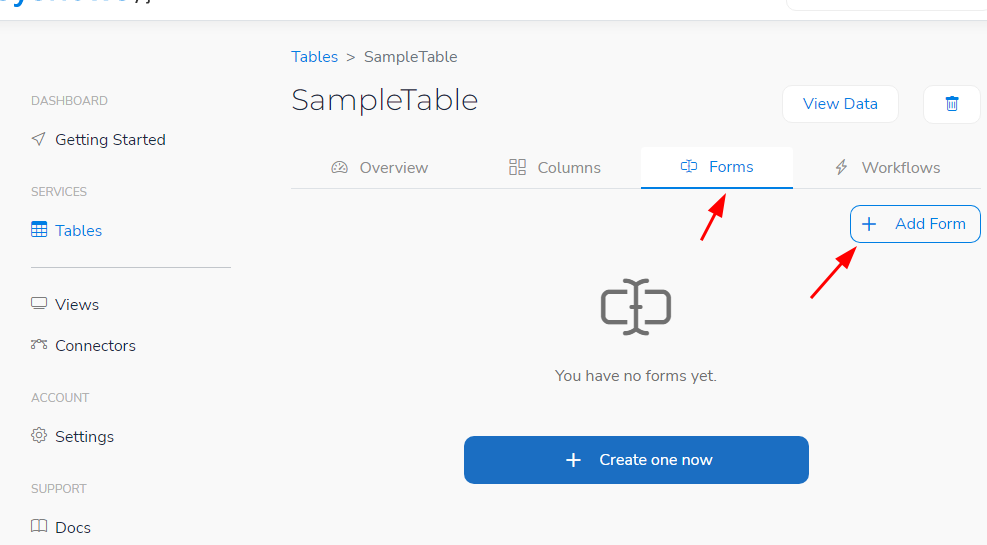
- Open the table that relates to
- Click the Forms tab
- Click Add Form
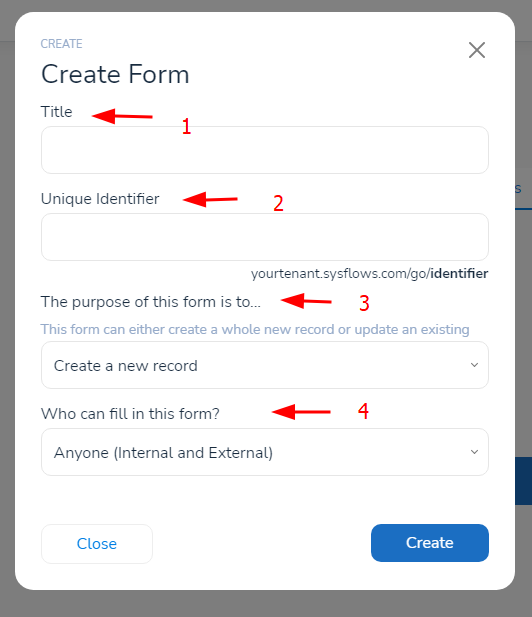
- The title of the form. Just a descriptive name for your own reference. ie. New Annual Leave Request
- The identifier makes part of the url. Ideally this should be easy and descriptive. ie. leave
- What to do with the data. Create a new record in the table or update an existing
- Permissions for who can use this form. Everyone (public), Internal, Specific
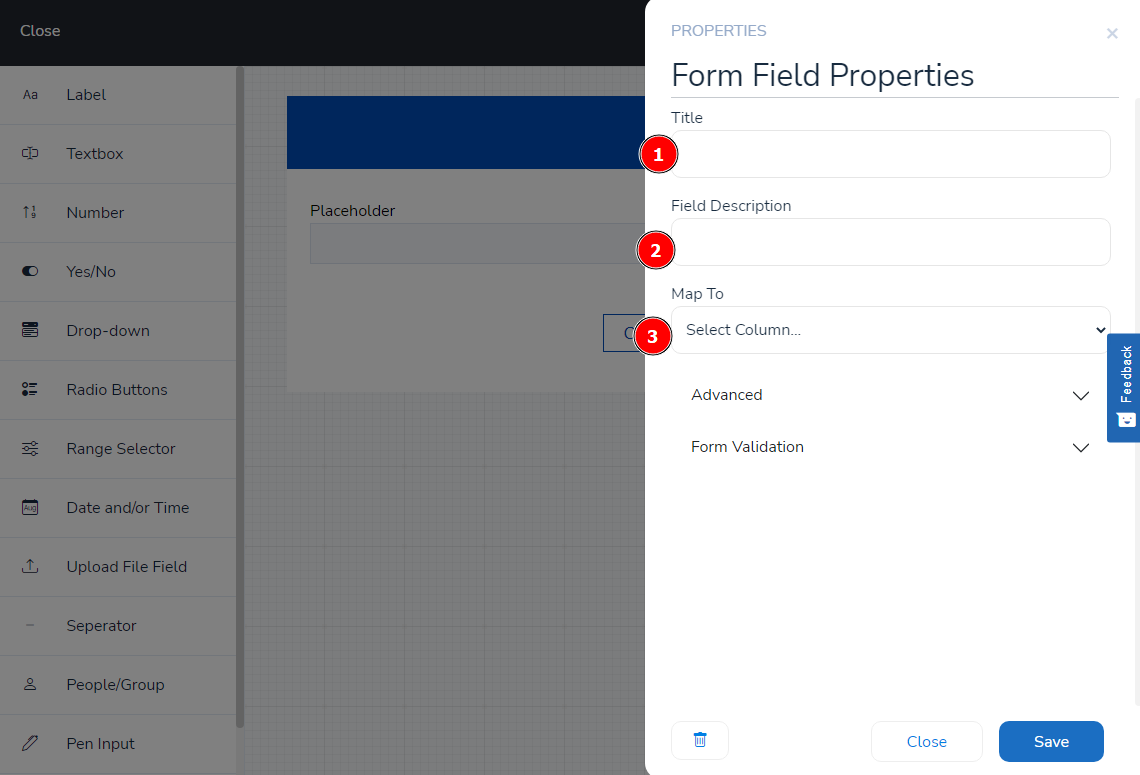

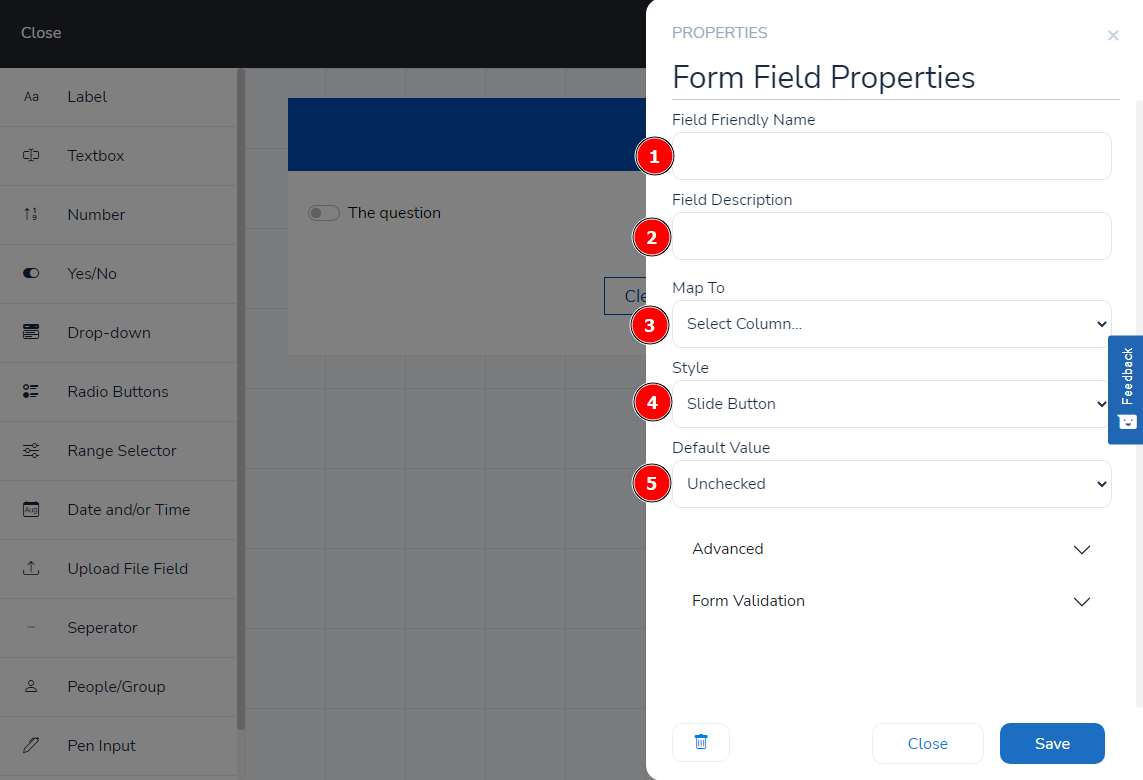
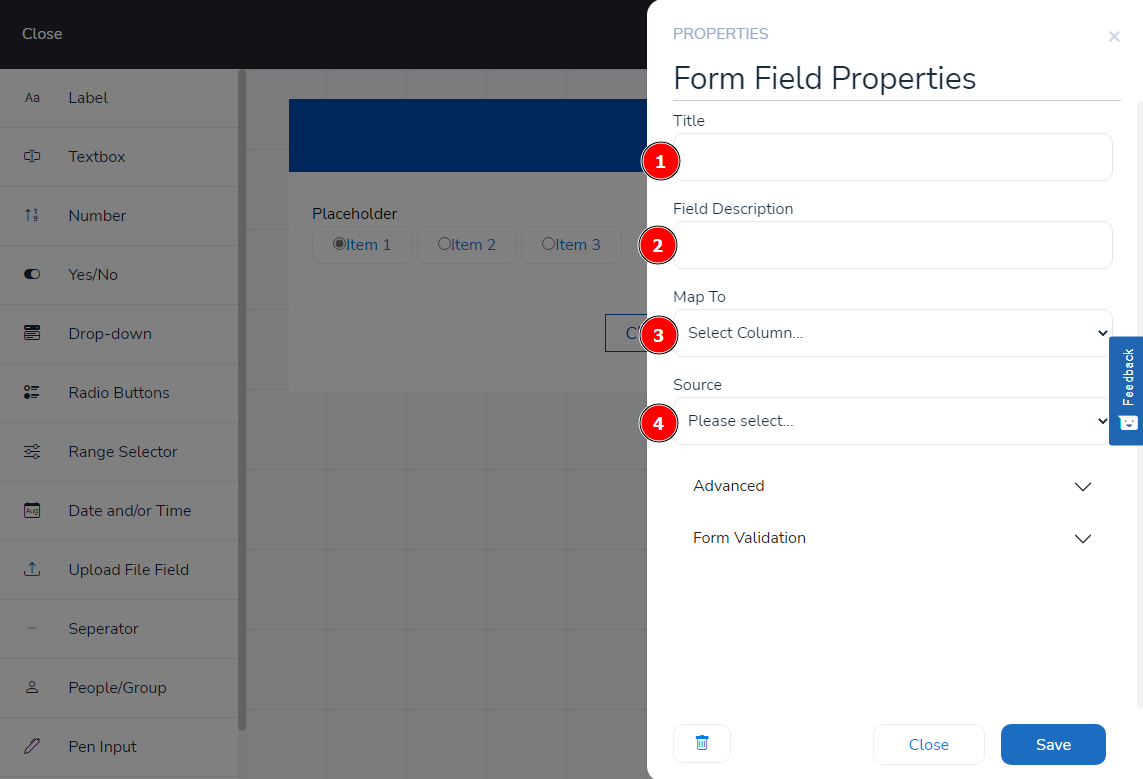
Dropdown
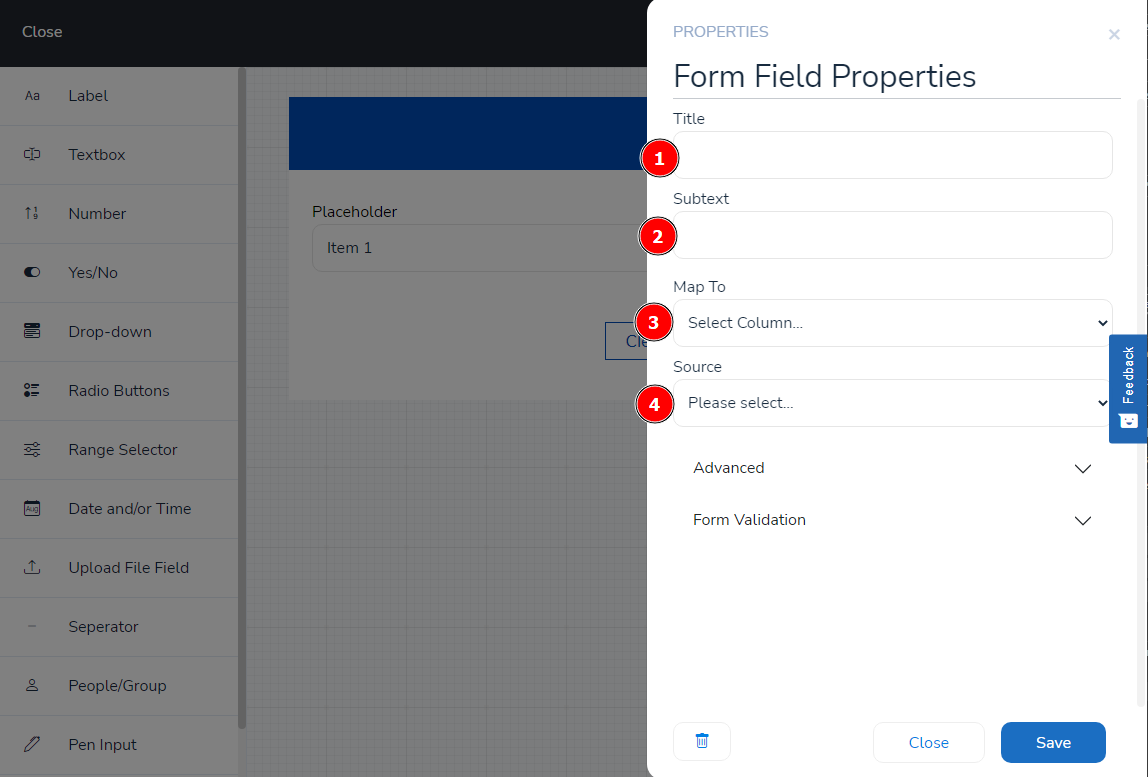
- The title to place above the field
- A description field. This is used when the client hovers over the control
- The Map To is what column this field saves to
- Source Manual or Lookup
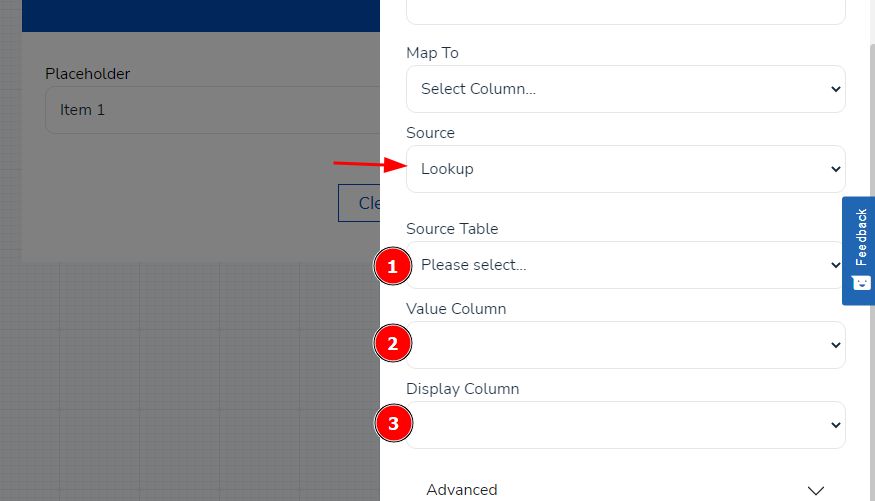
- The table to lookup
- This is the column to put as the value
- This is the column to use as the display to the user
Example: Let's say you have a table called Countries with Code and Name as columns. If you had Code as the value and Name as the display then a typical list of countries could be displayed but when the user submits the form, it could save into the column the Code value.